The secret world of gourmet mushrooms
There’s a little known secret about expensive gourmet mushrooms like shiitake, blue oyster, white oyster, lion’s mane and others — they grow on sawdust! With a little simple know-how you can grow these delicious mushrooms right in your own home.
Many of us grow and forage for our own fruits and vegetables here in Newfoundland and Labrador. Some of us keep animals for dairy, eggs, and meat. But what about the other food group, the one we almost always have to buy from the store? What about mushrooms?
The truth about mushroom seeds
Generally speaking, many of us know little about how edible fungi are grown, and information is scarce. Most gardening books do not cover fungi, and odds are your local seed supplier or gardening retailer doesn’t carry mushroom seeds (mycelium). However, it is surprisingly easy with a little bit of know-how. All you need is some mushroom mycelium, some large buckets, and some hardwood sawdust.
‘Normal’ grocery mushrooms, like Portobello and button mushrooms, grow in rich compost, and rare wild mushrooms like the chanterelle grow symbiotically with certain species of live trees. Many gourmet mushrooms, like shiitake, white oyster, blue oyster, chicken of the woods, lion’s mane, and many others, all eat dead wood. If you have a fresh supply of cut hard wood logs, you can ‘plant’ the logs with mushroom spawn, and grow mushrooms outdoors on these logs.
Growing mushrooms this way will take some time, generally one to two years for the log to fully colonize, before your first harvest. The result will be large flushes of mushrooms in Spring and Fall. However, since we are interested in growing a year-round supply of fresh mushrooms, we wanted a simple method that would allow us to grow indoors.
Fresh mushroom mycelium, or mushroom spawn, can be bought online from many sources, but the healthiest, most robust mushrooms we’ve ever grown have been with mycelium spawn from the man who wants to save the world with mushrooms, Paul Stamets. It’s well worth the extra cost of importing it from Washington state. After several rounds of trial and error, we developed a reliable method to propagate mycelium spawn and grow mushrooms indoors using buckets of sawdust.
Growing your own
To grow mushrooms indoors, you’ll need some mycelium spawn. You can buy hardwood doweling inoculated with mushroom spawn, this is probably the easiest method you can use to colonize a bucket of sawdust. With some experience you can also use pure spawn liquid culture to inoculate — this will lead to a faster colonization of the sawdust.
The easiest type of mushroom to grow indoors is white oyster, which are particularly hardy and have little risk of being choked off by competitors such as green mold (penicillium, which is also a fungus). However, the most delicious of all mushrooms is home-grown shiitake, so these are our top choice. The shiitakes you grow at home will be larger, firmer, browner, and much ‘meatier’ than the thin, sometimes-slimy shiitakes you can usually find in your local grocery store. We grow enough of both to ensure an ongoing supply.
Once you have some mycelium spawn, you’ll need some large plastic buckets, around 2-4 gallons in size. Theoretically, any type of hardwood sawdust can be used if it is boiled to sterilize it, but one trick we have learned is that hardwood sawdust blocks—the kind you burn in your wood stove—are heat-pressed, and thus pre-sterilized. These blocks cut down our contamination rates from mold to almost zero, and they are very cheap — a package of 4 6-pound hardwood blocks costs about $7 and can be used to inoculate 8 gallons of sawdust, enough to provide you with a continuous supply of mushrooms for many months afterwards.
Cut four to six 2-3 inch holes in your bucket, spaced apart. These holes allow mushrooms to grow out of the sides of the bucket as well as through the top. An easy way to drill the right sized holes is to use a drill bit sized for doorknob holes. Drill three or four half-inch holes in the bottom, to allow excess water to drain out of the bucket. Cover the side holes up with heavy duty tape, like tuck tape, but leave the drainage holes in the bottom open. Sterilize your bucket, your hands, and everything that will touch the sawdust, and you’re ready to inoculate the bucket with mycelium.

Oyster mushroom plugs a week after planting (left), and again at nine weeks (right). Once the surface of the sawdust is covered in a mass of white mycelium, it’s mushroom time! Photo by Lisa McBride.
Once your bucket is ready to go, prepare the sawdust. The blocks will quadruple in size when you add water, so choose the right number of blocks to avoid spilling sawdust out everywhere when you add water to the bucket. For our 3-gallon buckets, we use two of the six-pound hardwood blocks. Once the blocks are placed in the bucket, add freshly boiled hot water to the blocks until they expand fully. Add water until the sawdust stops absorbing water, you want the sawdust to be thoroughly soaked. If you are going to use another source of sawdust, ensure you sterilize it completely by boiling it thoroughly and proceed in the same fashion.
After the sawdust has cooled to room temperature, it’s time to add the mycelium. Open up the taped up holes on the sides, and scoop out a small amount of sawdust. Stuff the hole with a handful of the mycelium plug spawn, and seal the hole back up. Scatter mycelium spawn throughout the top layer of the sawdust, either on or slightly below the surface. Once it’s all done, put the lid on, put it on a shelf, and leave it alone for a while.
Your bucket will show signs of colonization in about a week. Tiny little white threads start to spread out through the sawdust – this is the mycelium, spreading out tendrils to colonize the wood and eat its nutrients. Check it once every week or two to ensure no competitor fungi, like green mold, have set up shop in your sawdust. Take off the lid, remove the tape from the holes, and look carefully. Scoop out any bits of green mold you might see, but avoid the white threads — those threads are the ‘roots’ of your mushroom! If the sawdust appears to be drying out on the surface, you should also add water to keep the sawdust moist. Once the check is done, seal everything back up and put it back on the shelf. Within 2-3 months, the sawdust will be fully penetrated and enveloped by mycelium. One day you will open up your bucket and it will look like it’s been emptied and replaced by marshmallow fluff!
You’ve got mushrooms!
Once colonization is complete and you have a nice fluffy white mass on the top and side holes of your bucket, it’s time to allow your mycelium to fruit (yes, fruit! The mushrooms are actually the fruiting body of the mycelium organism). Open up all the holes and simulate springtime rainfall on the bucket by misting it daily with a spray bottle. Exposure to fresh air and regular moisture will trick the mycelium into thinking it’s mushroom time in the Spring.
One to two weeks later, you will see little bumps above the surface of the mycelium — the first fruiting of mushrooms! At this point, mist the mushrooms two or three times daily, and watch as they double in size each day over a period of 10 or so days. With any luck, you will harvest a pound or more of delicious mushrooms from your first fruiting. Harvest them right before the ends completely unfurl to get them at their tastiest.
There are a lot of nutrients packed into a 3-gallon bucket of hardwood sawdust, so your mycelium will have food for months to come, and can last as long as a year before exhausting itself. Spent mushroom sawdust is excellent for compost, and the leftover mycelium may even spread and grow outdoors if you inoculate a pile of wood chips. Oyster mushrooms are voracious eaters and will even grow on coffee grounds and compost piles.

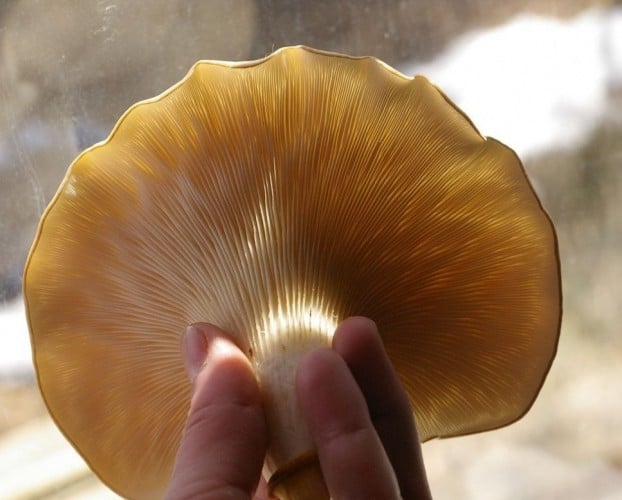
“Shiitake mushrooms are high in protein and supply a whole host of vitamin and mineral nutrients.” Photo by Lisa McBride.
Once the first fruiting is complete, set the bucket aside to rest uncovered for about a week, allowing it to dry out. Then, cover it up and leave it for another week. Once this is done you can begin the cycle again the same way you did the first time — open the bucket up, douse it with water, and begin misting it daily. The mycelium thinks Spring is here again and offers up another delicious batch of mushrooms.
Expanding your mushroom growing efforts is easy, since new buckets can be inoculated with a scoopful of mycelium-coated sawdust from your existing bucket. This is best done when you open up your mycelium to fruit for the first time, as there will be very little chance of contamination from other mold spores. Split off each new bucket until you have as many mushroom buckets in your mushroom patch as you wish. We currently rotate through six different mycelium buckets to ensure there are always fresh mushrooms growing.
Oyster mushrooms are delicious, and are very versatile in the kitchen. The gills do an excellent job of absorbing the sauce you cook them with, so they become very flavourful and can adapt to many dishes. They do a wonderful job of rounding out a good cream of mushroom soup. Shiitake mushrooms are very firm and meaty. They make an excellent meat substitute for many dishes, and since they are a source of ‘the fifth taste’, umami, they make for a very satisfying and savoury feed.
Shiitake mushrooms are high in protein and supply a whole host of vitamins and mineral nutrients. Lion’s mane, another type that is fairly easy to grow indoors, looks like coral as it grows, and tastes like lobster. It’s wonderful lightly fried in butter. Blue, gray, and pink oyster mushrooms taste similar to white oyster mushrooms and can add some lovely colour to your dishes.
There you have it — the building blocks for your own gourmet mushroom patch.
If you are looking for mushroom spawn, or want tips or advice on growing mushrooms at home, join our growing social media community Backyard Farming & Homesteading NL and step into the wonderful world of fungi!

Related Articles

DIY maple syrup: building a local tradition
Eight years into our do-it-yourself adventures in maple syrup, things are getting serious.
Bringing home the bees
Honey bees need our help, and Newfoundland is one of the last places on Earth where they can still be raised organically.
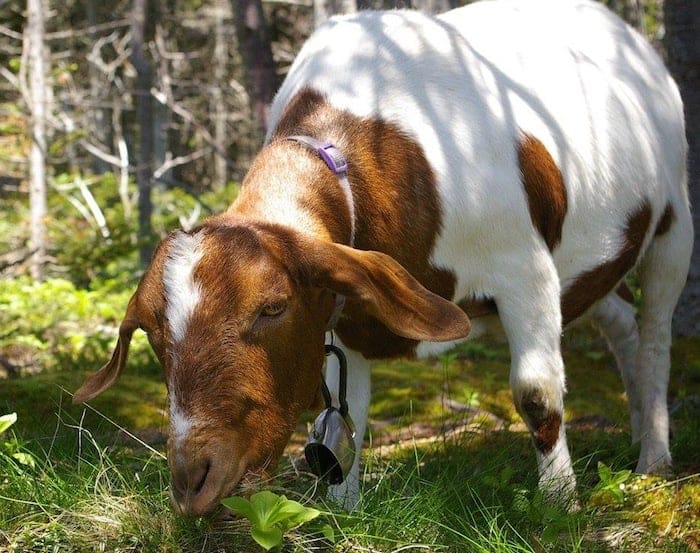
Goat Milk?
Goats are a wonderful addition to the household that can provide a family with milk, cheese, ice cream and other delicious treats.